

Edition 0
Mono-spaced Bold
To see the contents of the filemy_next_bestselling_novelin your current working directory, enter thecat my_next_bestselling_novelcommand at the shell prompt and press Enter to execute the command.
Press Enter to execute the command.Press Ctrl+Alt+F2 to switch to the first virtual terminal. Press Ctrl+Alt+F1 to return to your X-Windows session.
mono-spaced bold. For example:
File-related classes includefilesystemfor file systems,filefor files, anddirfor directories. Each class has its own associated set of permissions.
Choose → → from the main menu bar to launch Mouse Preferences. In the Buttons tab, click the Left-handed mouse check box and click to switch the primary mouse button from the left to the right (making the mouse suitable for use in the left hand).To insert a special character into a gedit file, choose → → from the main menu bar. Next, choose → from the Character Map menu bar, type the name of the character in the Search field and click . The character you sought will be highlighted in the Character Table. Double-click this highlighted character to place it in the Text to copy field and then click the button. Now switch back to your document and choose → from the gedit menu bar.
Mono-spaced Bold ItalicProportional Bold Italic
To connect to a remote machine using ssh, typesshat a shell prompt. If the remote machine isusername@domain.nameexample.comand your username on that machine is john, typessh john@example.com.Themount -o remountcommand remounts the named file system. For example, to remount thefile-system/homefile system, the command ismount -o remount /home.To see the version of a currently installed package, use therpm -qcommand. It will return a result as follows:package.package-version-release
Publican is a DocBook publishing system.
mono-spaced roman and presented thus:
books        Desktop   documentation  drafts  mss    photos   stuff  svn
books_tests  Desktop1  downloads      images  notes  scripts  svgs
mono-spaced roman but add syntax highlighting as follows:
package org.jboss.book.jca.ex1;

import javax.naming.InitialContext;

public class ExClient
{
   public static void main(String args[])
       throws Exception
   {
      InitialContext iniCtx = new InitialContext();
      Object         ref    = iniCtx.lookup("EchoBean");
      EchoHome       home   = (EchoHome) ref;
      Echo           echo   = home.create();

      System.out.println("Created Echo");

      System.out.println("Echo.echo('Hello') = " + echo.echo("Hello"));
   }
}
rhevm-api@lists.fedorahosted.org
).
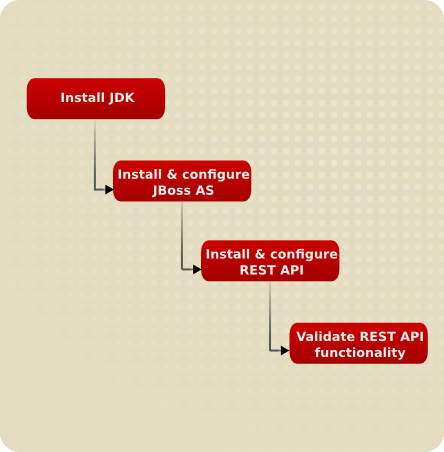
Java 6 Update 22. The JDK download is available at the Java SE landing page: http://www.oracle.com/technetwork/java/javase/downloads/index.html
%JAVA_HOME% environment variable must be set to the JDK path; the JBoss Application Server will not start unless this variable is correctly defined.
%JAVA_HOME% variable on the Red Hat Enterprise Virtualization Manager server, click Start, then right-click Computer and choose Properties. Toward the upper left of the System Properties window, click the Advanced system settings link. Next, click the Environment Variables... box, as shown below.
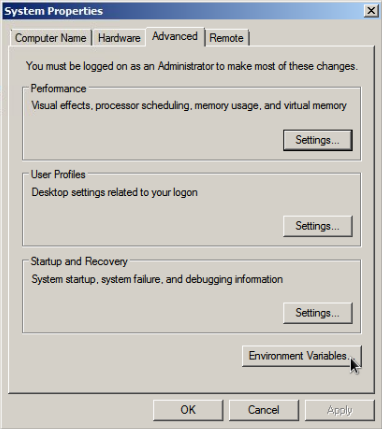
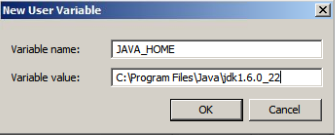
JAVA_HOME variable to the path to your newly installed JDK. In the example below, the variable is set to the default path for the 64 bit JDK 6u22 install.
C:\Program Files\ directory.
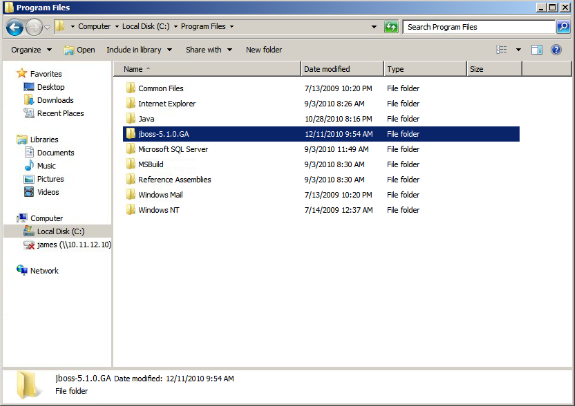
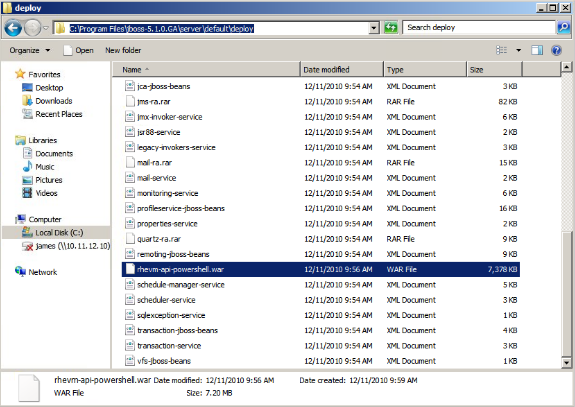
C:\Program Files, or any other location. Once unzipped, navigate into the webapp folder of the REST API. Copy the rhevm-api-powershell.war file and then paste it into the \server\default\deploy directory inside the JBoss install, as shown below.
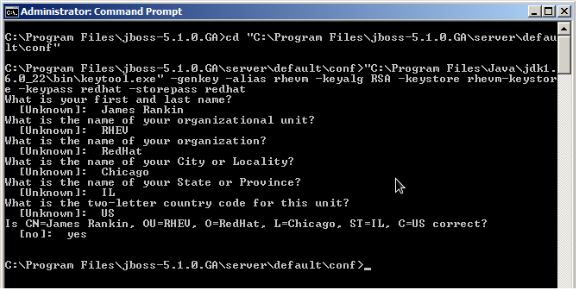
README_HTTPS file). To do this, open a command prompt in Windows as an Administrator. Navigate to the Command Prompt icon in the Start menu, right-click it, and choose Run as Administrator. If the command prompt is not opened as an administrator, then you will not have write access into Program Files. With the command prompt open, navigate to your JBoss\server\default\conf directory, and run the following Java keytool command to generate a certificate:
"C:\Program Files\Java\jdk1.6.0_22\bin\keytool.exe" -genkey -alias rhevm -keyalg RSA -keystore rhevm-keystore -keypass redhat -storepass redhat
keytool.exe is fully qualified and in quotes. If using a JDK other than 6U22, this path would be different, so using tab completion is advised. Also, note that the redhat values in this command are certificate passwords; please change these to any value you prefer. After running the keytool.exe command, answer the certificate creation questions when prompted. An example is below.
server.xml file in the JBoss install. Start WordPad as an Administrator and navigate to $JBOSS_HOME\server\default\deploy\jbossweb.sar\ and open server.xml. With the server.xml file open, find the following section:
<!-- SSL/TLS Connector configuration using the admin devl guide keystore
<Connector protocol="HTTP/1.1" SSLEnabled="true"
port="8443" address="${jboss.bind.address}"
scheme="https" secure="true" clientAuth="false"
keystoreFile="${jboss.server.home.dir}/conf/chap8.keystore"
keystorePass="rmi+ssl" sslProtocol = "TLS" />
-->SSL/TLS Connector... stanza is no longer commented out; these lines are commented out by default. Next, modify the keystoreFile and keystorePass values to correspond to the filename and passwords chosen when creating the certificate. Since the example here uses rhevm-keystore as the keystore file and redhat as the password, the server.xml should be edited as shown below:
<!-- SSL/TLS Connector configuration using our new keystore -->
<Connector protocol="HTTP/1.1" SSLEnabled="true"
port="8443" address="${jboss.bind.address}"
scheme="https" secure="true" clientAuth="false"
keystoreFile="${jboss.server.home.dir}/conf/rhevm-keystore"
keystorePass="redhat" sslProtocol = "TLS" />run.bat. Find the following section:
if "x%JAVA_OPTS%" == "x" (
  set "JAVA_OPTS=-Dprogram.name=%PROGNAME%"
) else (
  set "JAVA_OPTS=-Dprogram.name=%PROGNAME% %JAVA_OPTS%"
)
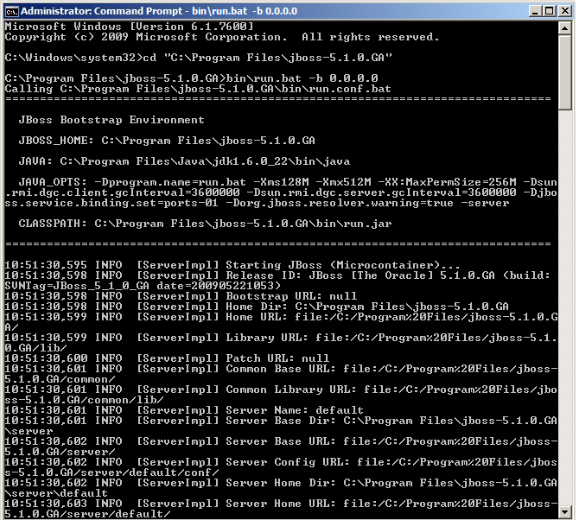
if "x%JAVA_OPTS%" == "x" (
  set "JAVA_OPTS=-Dprogram.name=%PROGNAME% -Djboss.bind.address=0.0.0.0 -Djboss.service.binding.set=ports-01"
) else (
  set "JAVA_OPTS=-Dprogram.name=%PROGNAME% -Djboss.bind.address=0.0.0.0 -Djboss.service.binding.set=ports-01 %JAVA_OPTS%"
)
.\bin\run.bat
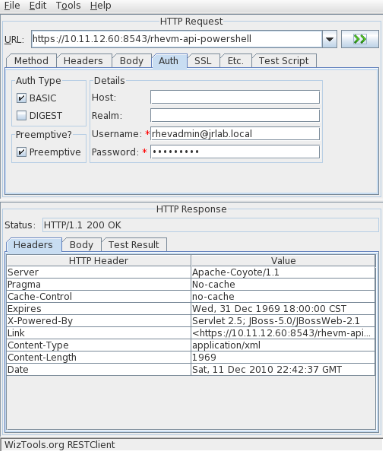
rhevadmin)
cd $JBOSS_HOME\bin
.\service.bat install
JBoss Application Server 5.1 should be in the list. Right click over the service and select Properties. To finish the setup, change the Startup type from Manual to Automatic and click OK.
run.log. You can inspect the file for any errors during service startup.
bin\README-service.txt if need extra instructions or how to unistall the service.
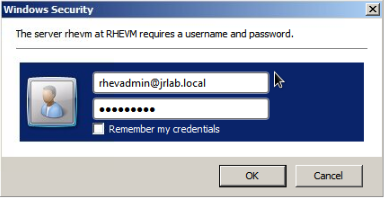
https://<rhevm-IP-address-or-FQDN>:8543/rhevm-api-powershell/<username>@<domain-name>. In the example below, the username is rhevadmin and the domain is jrlab.local.
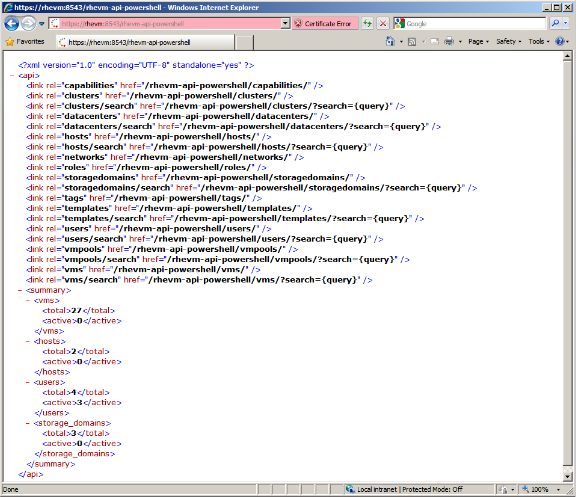
/rhevm-api-powershell/vms and other URLs to see more information on your Red Hat Enterprise Virtualization environment. Please consult the Red Hat Enterprise Virtualization REST API Guide for additional options and details.
java -jar <jar-file-name>.
redhat.
| Revision History | |||
|---|---|---|---|
| Revision 0 | Wed Feb 23 2011 | ||
| |||